How to install a Setra balance and 3 dangerous things to look out for.
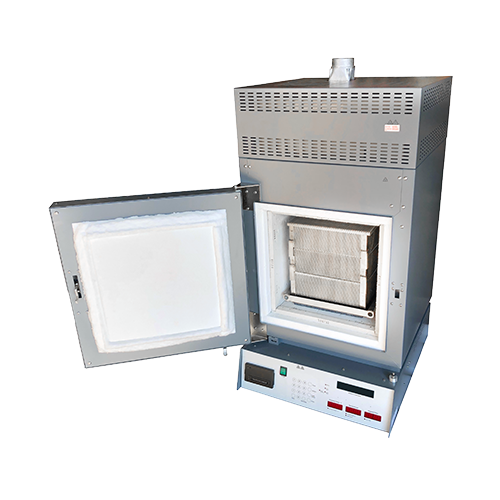
There is a metal box that sits inside of your NCAT Ignition Oven. It’s rectangular and sits directly under the burn chamber. That box is the reason why your oven can perform the burn-off method so accurately, but that same box also has the potential to ruin hours, days, or even months of testing if not installed correctly. The Setra balance is one of the most often overlooked parts of the NCAT Ignition Oven, and today I’ll be explaining why it’s necessary to pay it the attention it deserves.
How The Setra Works
The Setra balance is designed to be used only in an NCAT Ignition Oven. The silver base sits on a platform directly under the burn chamber under many layers of insulation. The Setra uses four points of contact to secure a metal plate to its base. On top of that metal plate, another plate is seated that has four standoffs. There are four ceramic tubes that rise up from the standoffs through all of the insulation and support the hearth plate that is inside of the chamber. The Setra can then detect any object that is placed on the hearth plate and returns its translated mass into grams.
Basically, the balance works like any other balance just with a few extra pieces of hardware to protect itself from the intense heat.
How to Install a Setra Balance
What you will need:
- The Setra balance box
- Scale circuit board
- Ribbon connector
- Metal Plate (no standoffs)
- Metal plate (with standoffs)
- 4 screws (comes with the setra)
- 4 ceramic tubes
- 1 hearth plate
- 1 small Phillips head screwdriver
First, before you place the Setra inside of the NCAT, attach the metal plate (without the standoffs) to the Setra. Four screws secure the metal plate to the base and during installation, you must make sure the metal plate is oriented correctly. The screw heads need to be flush with the metal plate. If they are sticking up, your balance will never read correctly if at all.
Next, place the other metal plate (yes, the one with the standoffs) on top of the first metal plate with the standoffs facing up. The second plate will seat into the first plate where the screw heads and holes line up.
Now you need to open the front control panel of the NCAT. The screws that secure the panel to the unit run along the top. The angle can be a little weird, but a small screwdriver can get the job done. Behind the control panel, you should see a platform in the middle. This is where you will put the Setra (with the metal plates attached). At this point it’s helpful to try to position the balance in the middle of the platform under the holes, however, you will be able to see where the scale should sit on the next step.
Open the door to the NCAT chamber and slowly lower a ceramic tube down into one of the holes and line it up with one of the standoffs on the Setra. Repeat this process until each of the ceramic tubes is secure onto their respective standoffs. Here are some things to look out for:
- Make sure that none of the ceramic tubes are touching the sides of the holes they are placed in. Not doing so will also create incorrect readings.
- Make sure there aren’t any chips or dips on the top of the tubes.
- The hearth plate needs to sit flush on the ceramic tubes and if there are chips or dips, the scale readings will be inaccurate.
- Make sure that the ceramic tubes are all the same height.
Next, sit the hearth plate on top of each of the ceramic tubes making sure that the standoffs on the bottom of the hearth plate fit into each of the holes of the tubes.
My hearth plate is flat on both sides, how do I line them up?
You don’t. The hearth plate is designed to have four standoffs that sit into each of the tube holes. Without them, each time you place a basket into the chamber, the plate will move. This means that your balance readings will be incorrect. If your hearth plate doesn’t have standoffs on it, you should discard it and get a new one.
Installing the Scale Board
Installing the scale board is relatively easy provided you understand where everything connects. The Setra board is screwed into the back of the control panel where the display board sits. If you’re lucky, the screws are still attached to the control panel, but if you’re not lucky, you’ll need to purchase a new set of screws.
Three things must be connected to the scale board for the Setra to function:
- The red and white power connector.
- The ribbon connector that is attached to the Setra box.
- Make sure that this cable isn’t kinked or bent, otherwise, the Setra won’t work properly.
- The serial connector
As long as these three things are connected, your Setra is ready to go. Close up the control panel, and your NCAT Ignition oven is ready!
Remember to calibrate and verify your new scale before you run a burn.
Maintaining your Setra
Periodic cleaning of your metal plates can extend its life and help to keep your readings accurate. All it takes is a bit of WD-40 and isopropyl alcohol to wipe off the asphalt buildup. Each of the standoffs can be removed and cleaned as well. Do not try to clean the plates while they are connected to your Setra. Serious damage to your Setra can occur and your unit may not work afterward.
Yearly Calibration
The Setra balance is required by most State specs to be calibrated each year due to its high accuracy. Some states even require your scales to be calibrated twice a year. Gordon Technical technicians are highly trained to perform this service and can calibrate the rest of your lab equipment as well. We use Class 1 weights to calibrate your Setra Balance and test it at multiple points to ensure compliance.
We also offer refurbished balances to our customers who need a Setra but don’t want to pay the new scale price. Our refurbished balances come backed by our 1-year warranty and are verified before we send them out to your location. If you are already having us perform your calibrations, we can bring one by on our next trip, set it up and calibrate it for you.